Hello Stampers.
Welcome to my Blog today. I hope you are having a creative Day!
Yesterday I held my monthly Card Class To Go which featured the fun Bundle called Kindest Gnomes (159626). This Bundle can be used for a variety of occasions. We made 3 cards and had lots of fun. This class was held Via Zoom.
I love these cute little Gnomes
Card # 1
Measurements
- Card base: Coastal Cabana 8 1/2" x 5 1/2" scored @ 4 1/4".
- Storybook Gnomes Designer Series Paper layer 5 1/4" x 2"
- Coastal Cabana layer 5 1/4" x 2 1/4" embossed with the Stripes & Splatters 3D embossing folder.
- Poppy Parade cardstock is die cut with the 3 1/4" x 2 1/4" Stitched Rectangle
- Basic White cardstock is die cut with the 3 1/8"x 1 7/8" Stitched Rectangle .
- Adhere the Basic White Rectangle to the Poppy Parade Rectangle.
- Die cut the Gnome from the Storybook Gnomes Designer Series Paper and adhere to the Basic White layer with dimensionals.
- Embellish with the Fine Sparkle adhesive backed gems.

Card # 2
Fun Fold Flip Card
Measurements
- Card base is Mint Macaron 8 1/2" x 5 1/2" scored @ 4 1/4"
- Rings of Love Designer Series Paper 5 1/4" x 4"
- Using the Stylish Shapes Dies cut out the Mint Macaron and Basic White squares.
- Stamp the Gnome with Tuxedo Black Memento ink then colour with Stampin' Blends. Die cut
- 1" x 4 1/2" strip of Mint Macaron cardstock
- Attach the strip to the back of the Mint Macaron square then fold at the right edge, attach the other end of the strip to the inside of the card on the right hand side.
- Attach a layer of Basic White 5 1/4" x 4" to the inside which will cover the strip
- Stamp the inside sentiment which is from the Penguin Place stamp set.
- Stamp the sentiment for the front of the card on labels from the Stylish Shapes dies Embellish with the Fine Sparkle Adhesive Backed gems.
Card # 3
Measurements
- Pacific Point card base 11" x 4 1/4" scored @ 5 1/2"
- Basic White layer is 5 1/4" x 4" embossed with the Fern 3D embossing folder
- Storybook Gnomes Designer Series Paper 5" x 1 3/4" adhere to the left of the embossed layer,
- Die cut a layer of Silver foil with the Scalloped Contour die
- Stamp and colour the Gnome then die cut it
- Adhere the Gnome to a 2 /34"x 1 3/8" Basic White Stitched Rectangle
- Cut a Wonderful Snowflake in half and adhere to the back of the Silver die cut.
- Stamp the sentiment in Pacific Point on a Stylish Shapes label.
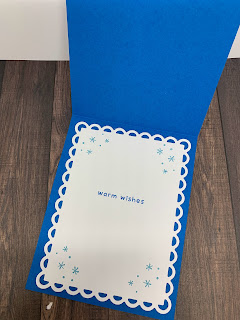
- Inside Layer:
- Basic White Scalloped Contour die
- Stamp the snowflakes from the Penguin Place stamp set in Balmy Blue.
- Stamp sentiment in Pacific Point.
-

August Card Class To Go
Product List

.jpg)


No comments:
Post a Comment